Setting Up Store Design
In SiteLink Corporate Control Center (CCC) click “Web Template Setup” to setup the look and function of your SiteLinkStore website. Changes made here are simple to undo or change. Try different settings, looks, images etc, to get the look you want. If you have multiple SiteLink facilities, you will be presented with a screen to choose which store to edit by double-clicking the store name.
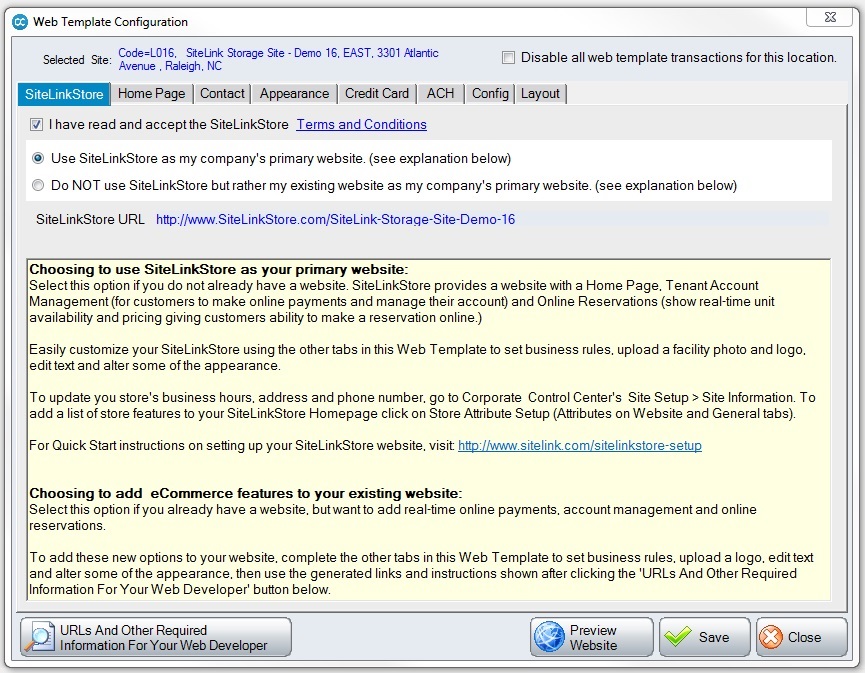
- Enable your SiteLinkStore website to make it active.
- After reading the Terms and Conditions, Check the “I have read and accept the SiteLinkStore Terms and Conditions” box.
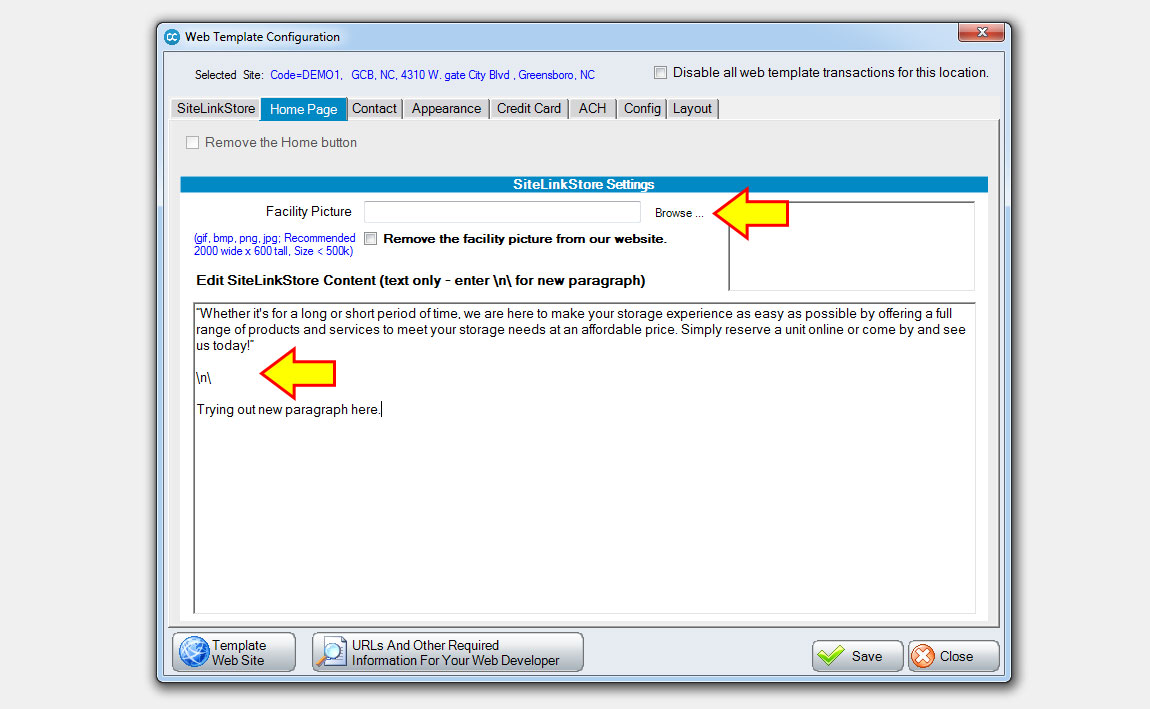
- Change the main photo and text on your home page
- Choose a homepage image by clicking “Browse”. Select a photo from your local computer hard drive. Recommended size = 600 pixels tall x 2000 pixels wide.
- NOTE: Size limitations may require you to resize the image in Microsoft Paint or some other image editing software. If you do not have an image there is a default image that will show on your website. You can always come back and upload a photo later or change what you upload at any time.
- Enter your homepage text content (shows under home page image.)
- Feel free to enter whatever text you like here. The default sample text is:
- Whether it's for a long or short period of time, we are here to make your storage experience as easy as possible by offering a full range of products and services to meet your storage needs at an affordable price. Simply reserve a unit online or come by and see us today!
- Type \n\ on its own line to create a new paragraph.
- TIP: Use this area to describe your business and entice customers - why should a potential customer rent from you over the competition, what sets you apart? You may also use this area to include periodic move-in specials!
- Choose a homepage image by clicking “Browse”. Select a photo from your local computer hard drive. Recommended size = 600 pixels tall x 2000 pixels wide.
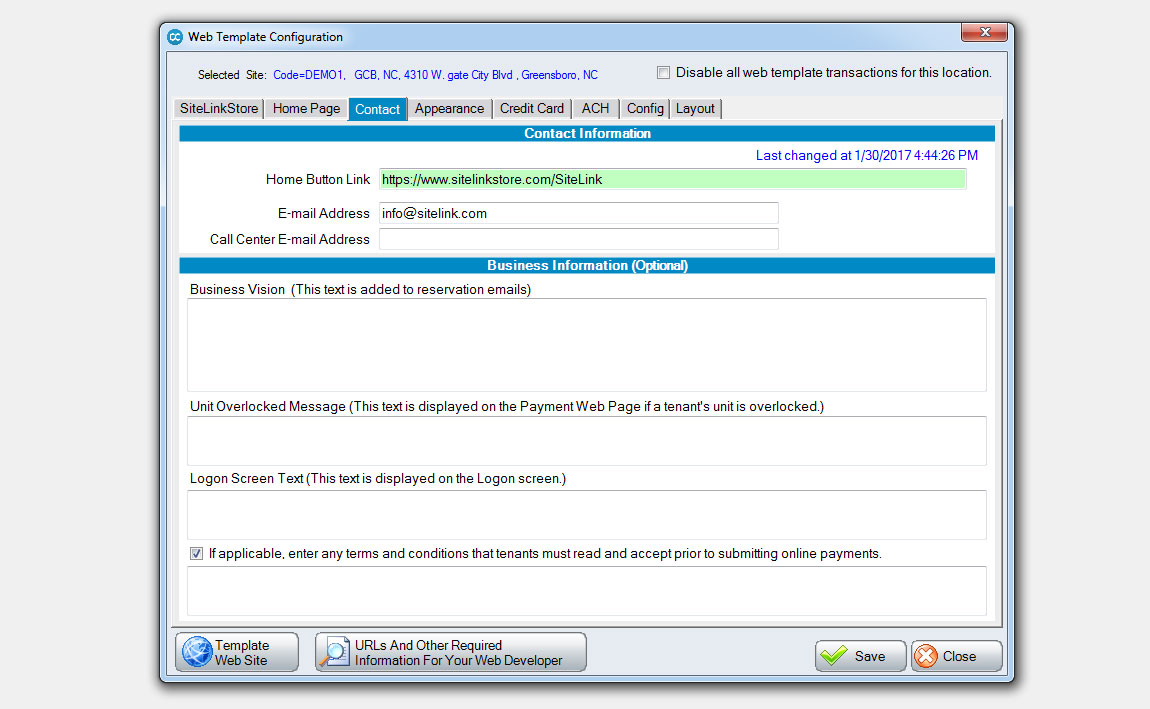
- Configure custom messages (from the Contact Tab)
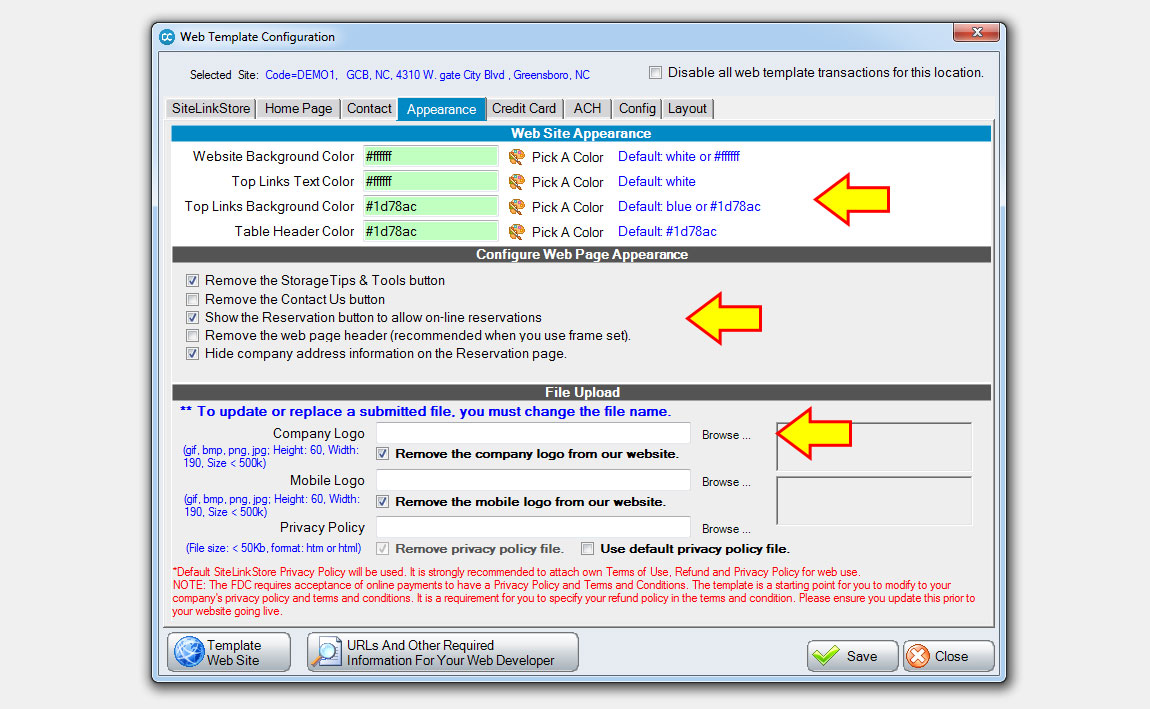
- Change website colors and add a company logo (from the Appearance Tab)
- OPTIONAL: The top section (Web Site Appearance) adjusts your website color scheme, you may choose different colors by clicking on each “Pick A Color” pallet.
- OPTIONAL: The second section (Configure Web Page Appearance) controls what sections are shown on your website navigation bar (we recommend the settings above.)
- The third section is for adding Logos. The first “Company Logo” should be your main company logo or business card. Recommended size = 60 pixels tall x 190 pixels wide. (We recommend leaving the other two sections alone unless you have a specific need.)
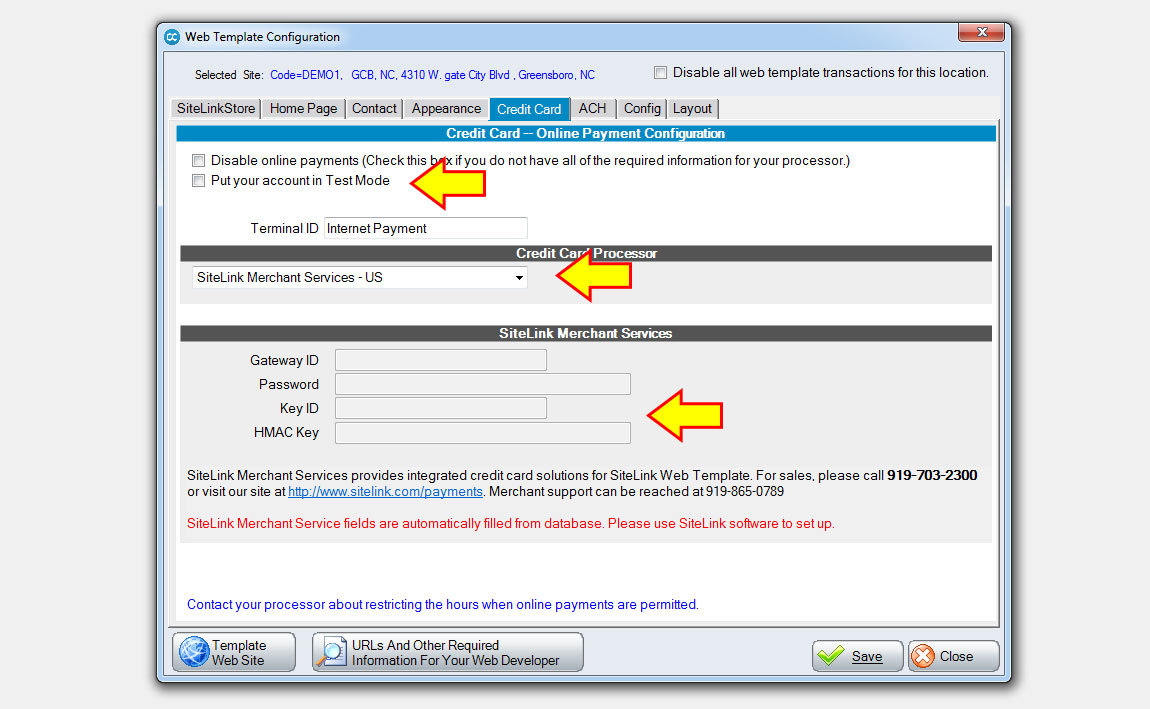
- Setup online credit card payments (from the Credit Card Tab)
In order to take payments online, this tab must be completed.
- This setup should reflect the same Credit card setup you use for in-store payments.
- Please call Customer Support if you have questions 919-865-0789 (opt 2).
-
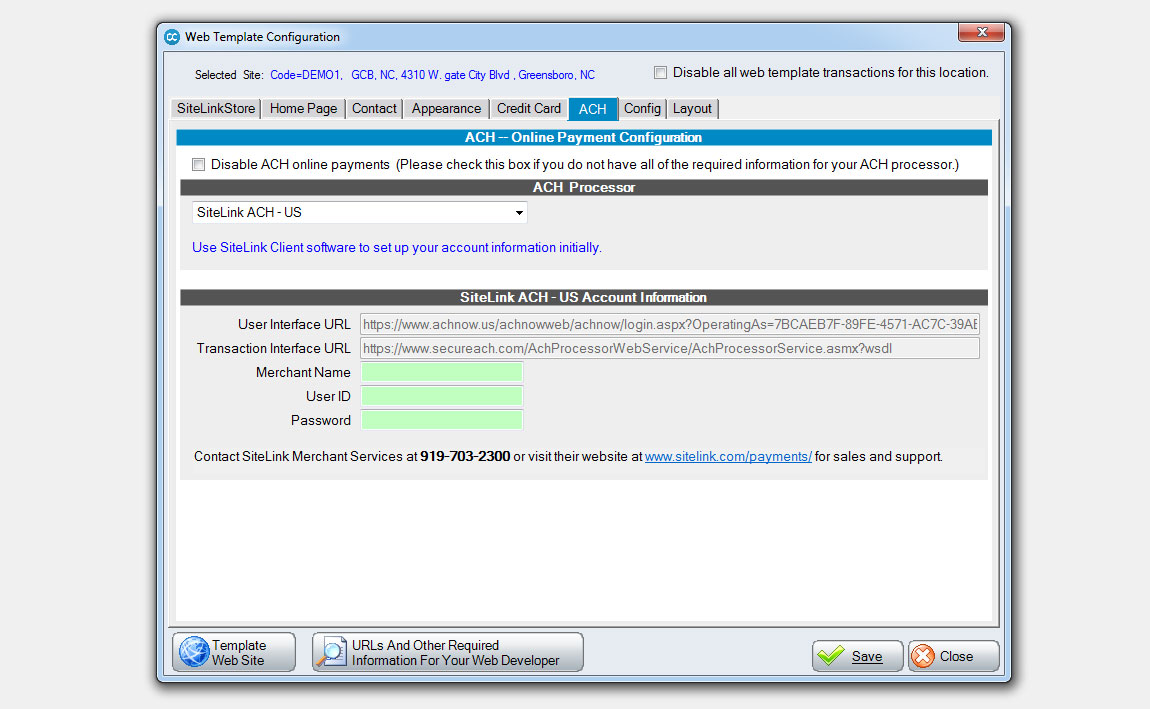
Setup online check payments (from the ACH Tab)
ACH payments auto debit from a checking account using account & routing number.
You may choose to accept ACH payments from your website.
- Uncheck the “Disable ACH online payments” box if you have an ACH provider setup in Web Edition and wish to accept these types of payments on-line. Many owners choose to only accept Credit Cards online. If you have many customers who do not have Credit or Debit Cards this feature may be useful.
- Select the ACH Processor used by the in-store setup.
- Please call Customer Support if you have questions 919-865-0789 (opt 2).
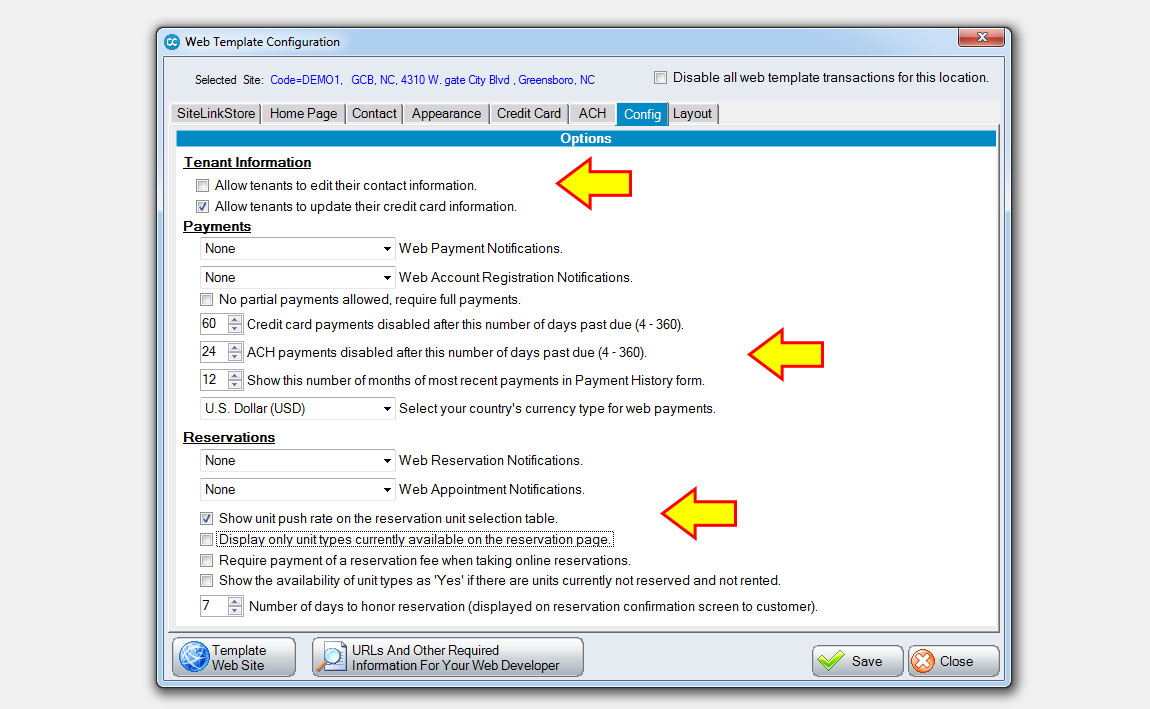
- Setup your store’s rules for doing business (from the Config Tab)
The Config Tab is used to setup Business Rules for your facility’s website. Allowing your customers to “Self Serve” on your website requires understanding of your clients.
- Choose what information you will allow your tenants to edit by checking applicable boxes.
- The pre-populated numbers in section 2 are NOT recommendations, they are placeholders. Please think through the implications of each setting. For instance: A very common setting is to disallow partial payments after overdue. Another common setting is to disallow ACH after overdue. If you have questions please call your account manager or Customer Support at 919-865-0789 (options 1 and 2 respectively).
- The pre-populated settings in section 3 are NOT recommendations they are placeholders. Please think through the implications of each setting. For instance “Email and Bulletin” are the most common reservation notification types, this allows your manager to know you’ve received a reservation.
-
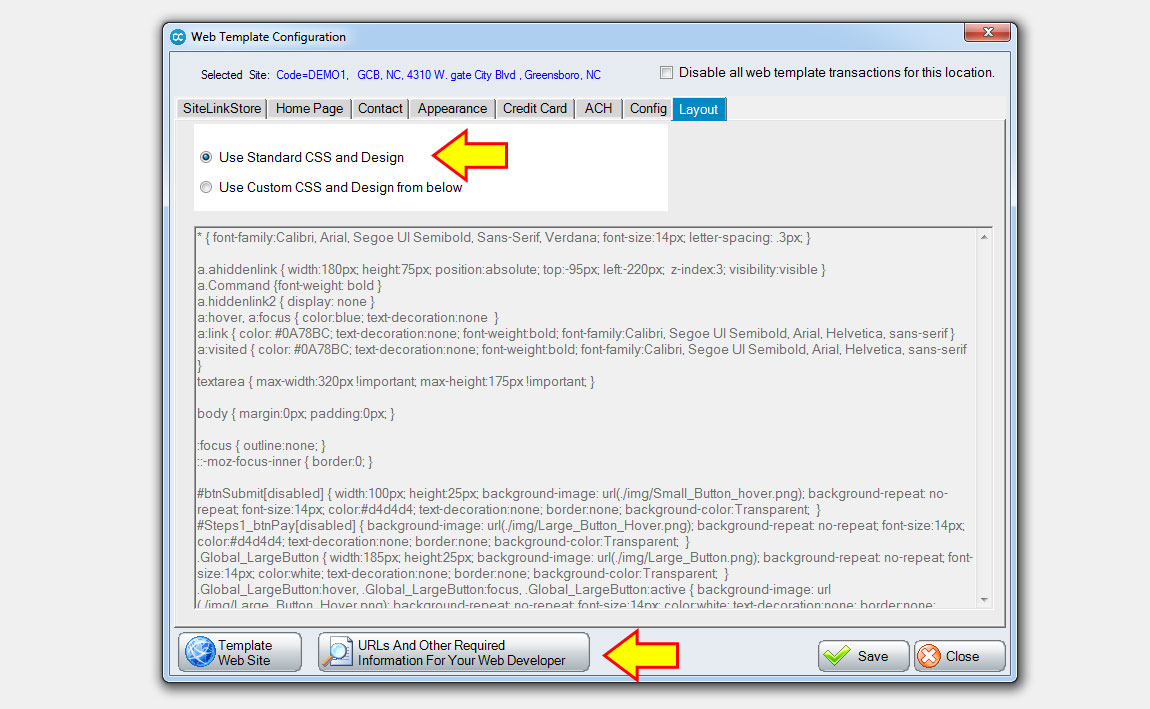
Customize the website’s CSS layout (from the Layout Tab)
- The appearance of your SiteLinkStore website is ready to go out of the box. However, you have the option of customizing its look by modifying its cascading style sheet (CSS). Unless you are adding your own CSS code to your website, the CSS radio button should remain on “Standard CSS and Design”. Custom CSS will override some of the settings you just configured and should only be configured by knowledgeable web developers.
-
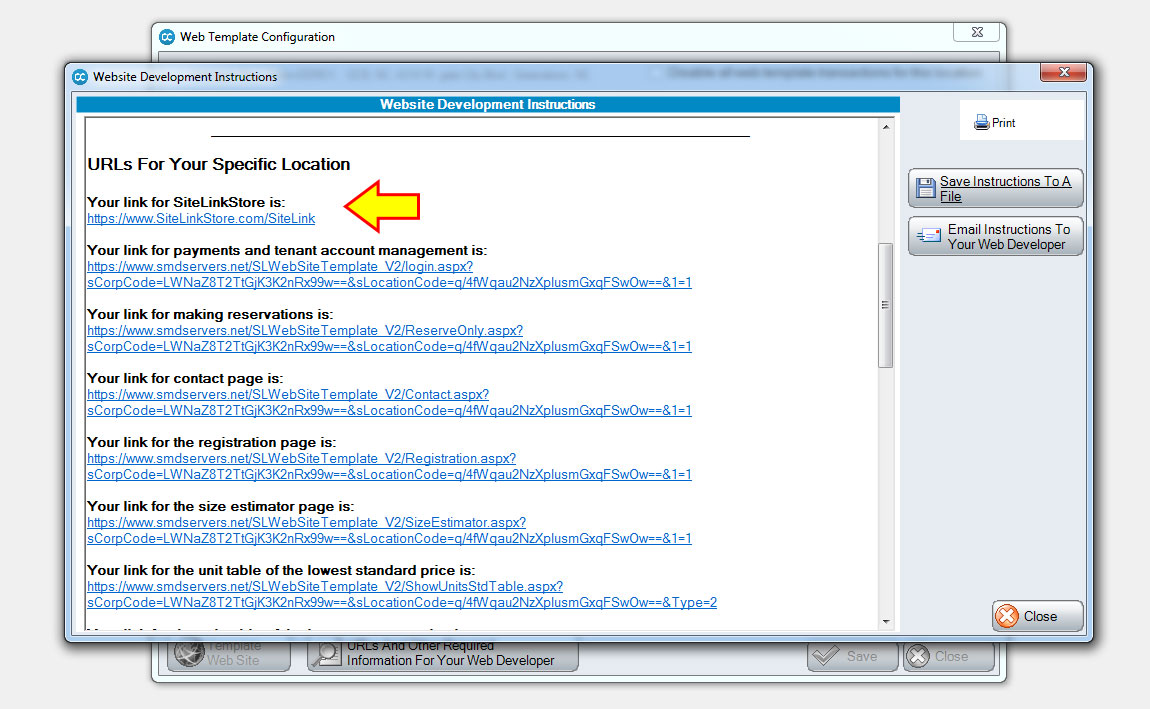
Website address (URLs) and other useful information
If you need your SiteLinkStore website address, find it at bottom of the Web Template Configuration screen, click “URL’s And Other Required Information...” button. Your URL is located a few paragraphs down.
In order to use the SiteLinkStore free website, select the top radio button “Use SiteLinkStore as my company’s primary website...” "NOTE: The radio button “Do NOT use...” is only selected when you have your own website and just want to add SiteLink Web Template to integrate payments, reservations, etc. to your existing website. Many of the settings for SiteLinkStore share functionality with the SiteLink Web Template integration.
No changes are required on this page unless you want to add some custom messages.
SiteLink Resource Links
» Quick Start Guide » Setting Up Store Address » Setting Up Store Design » SiteLinkStore Experimentation » Quick Start GuideSign Up For Notifications
Register to be notified by a variety of SiteLink and Industry emails and announcements.
Manage Email PreferencesRemote Support
SiteLink support uses Team Viewer to access your computer when providing technical support.
Download Support Module